


In general, inFlow locations should represent buildings, and sublocations should represent the shelves/aisles/bins within a specific building.
If you’re currently using the location field to track your shelves/aisles/bins, we recommend converting those locations into sublocations instead. This is a real benefit if you have multiple physical addresses where you store inventory, because you can then set up different reorder points and quantities per location.
If you prefer a video that you can watch and pause, we’ve created this one just for you:

But if you prefer written instructions and view screenshots, read on to see how to see our instructions for the Windows app.
You’ll be doing this via an export and import process. Following this guide, you’ll be exporting your locations & quantities, and then re-importing them into inFlow as sublocations using Excel. You can do this via the desktop app or web app.
Step 1: Temporarily zero out current locations
First, you’ll need to export your current stock & locations, making sure that you’re only modifying the location data that needs to be changed to sublocations.
- Go to the Main Menu > General > Export Data and choose Reorder Settings. Keep this file around, we’ll need it for Step 4.
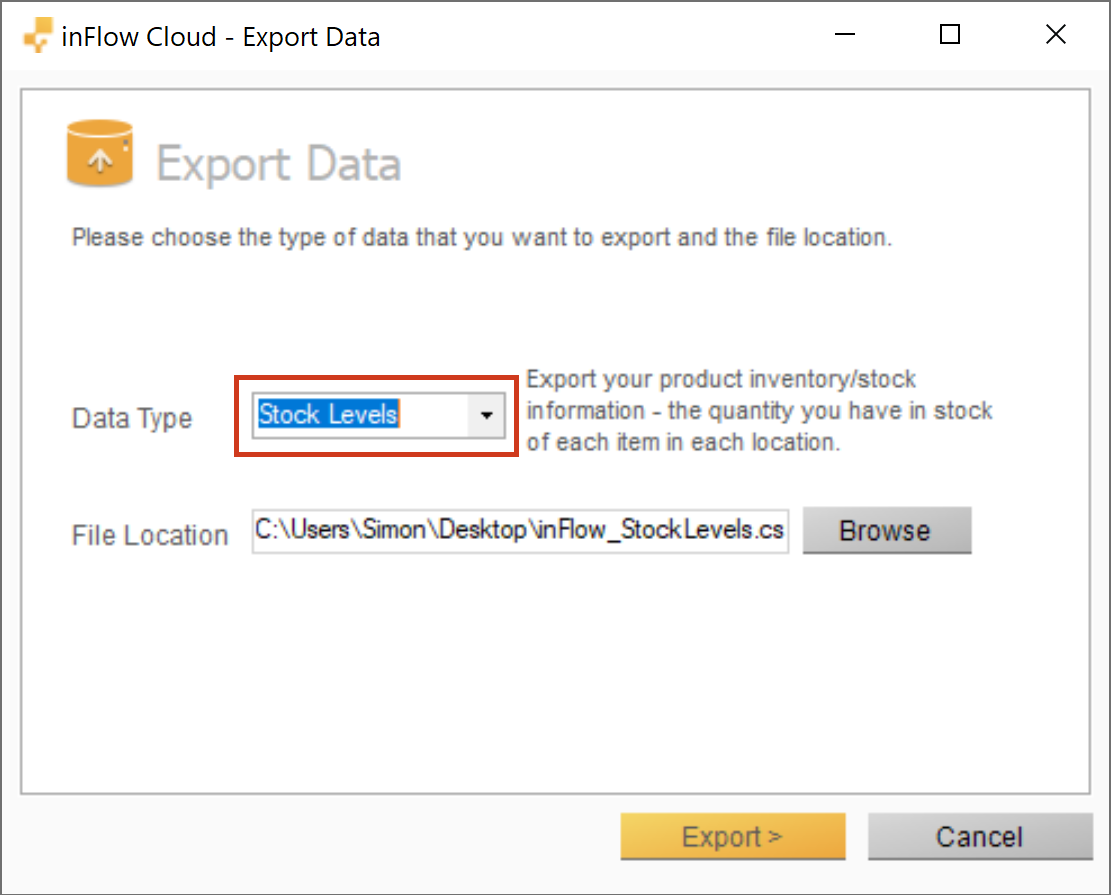
- Then go to Main Menu > General > Export Data and choose Stock Levels.
- Then open the the inFlow_StockLevels.csv file. Check your file for any locations you want to keep as is and remove those rows. Save the file as a .csv file type when you’re done.
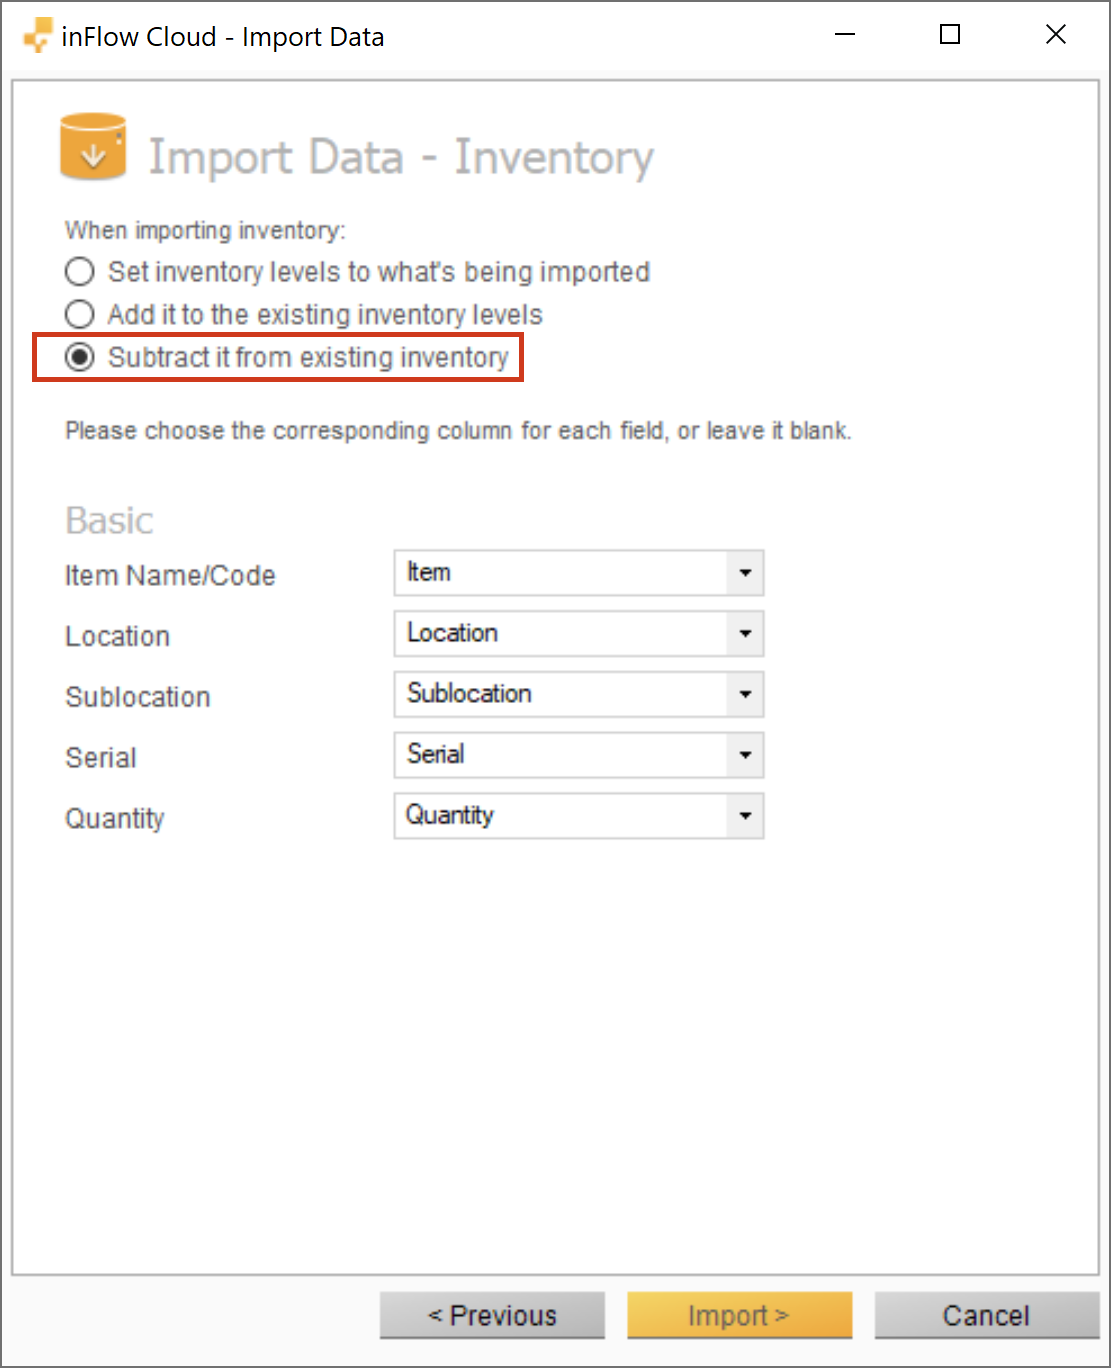
- Now go to Main Menu > General > Import Data and choose the csv file. Select Subtract it from existing inventory.
Step 2: Create sublocations and deactivate old locations
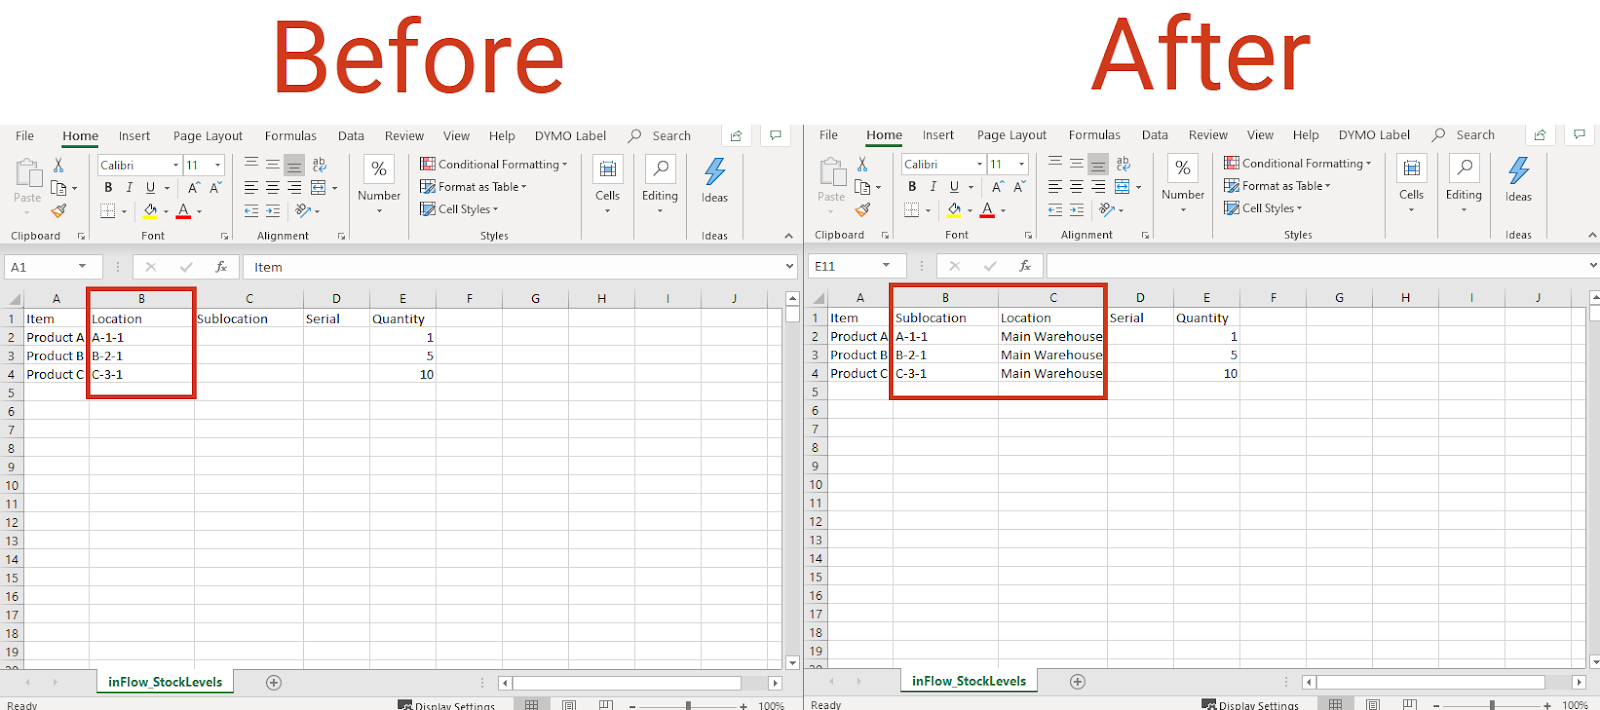
- Open the csv file. Rename the Location heading to Sublocation, then add a new column heading called Location.
- Below this new Location column heading, enter the name of your main location for each sublocation (e.g. Main Warehouse). Tip: if you only have one main location, you can copy this down the whole column.
- You should end up with a file where the previous location names are now under the Sublocation heading. Save the file as a .csv file type, and then close the file.
Now let’s make sure you have sublocations enabled, then you can import that file back to inFlow.
- Go to the Main Menu > Options > Settings > Track Inventory By and click Locations broken down into sublocations.
- You can also go ahead and deactivate all the locations that you’ll be turning into sublocations.
Step 3: Re-import your inventory
- Go to the Main Menu > General > Import Data.
- Select Stock levels from the Data Type drop-down menu, then click Next.
- Click Browse to choose the csv file.
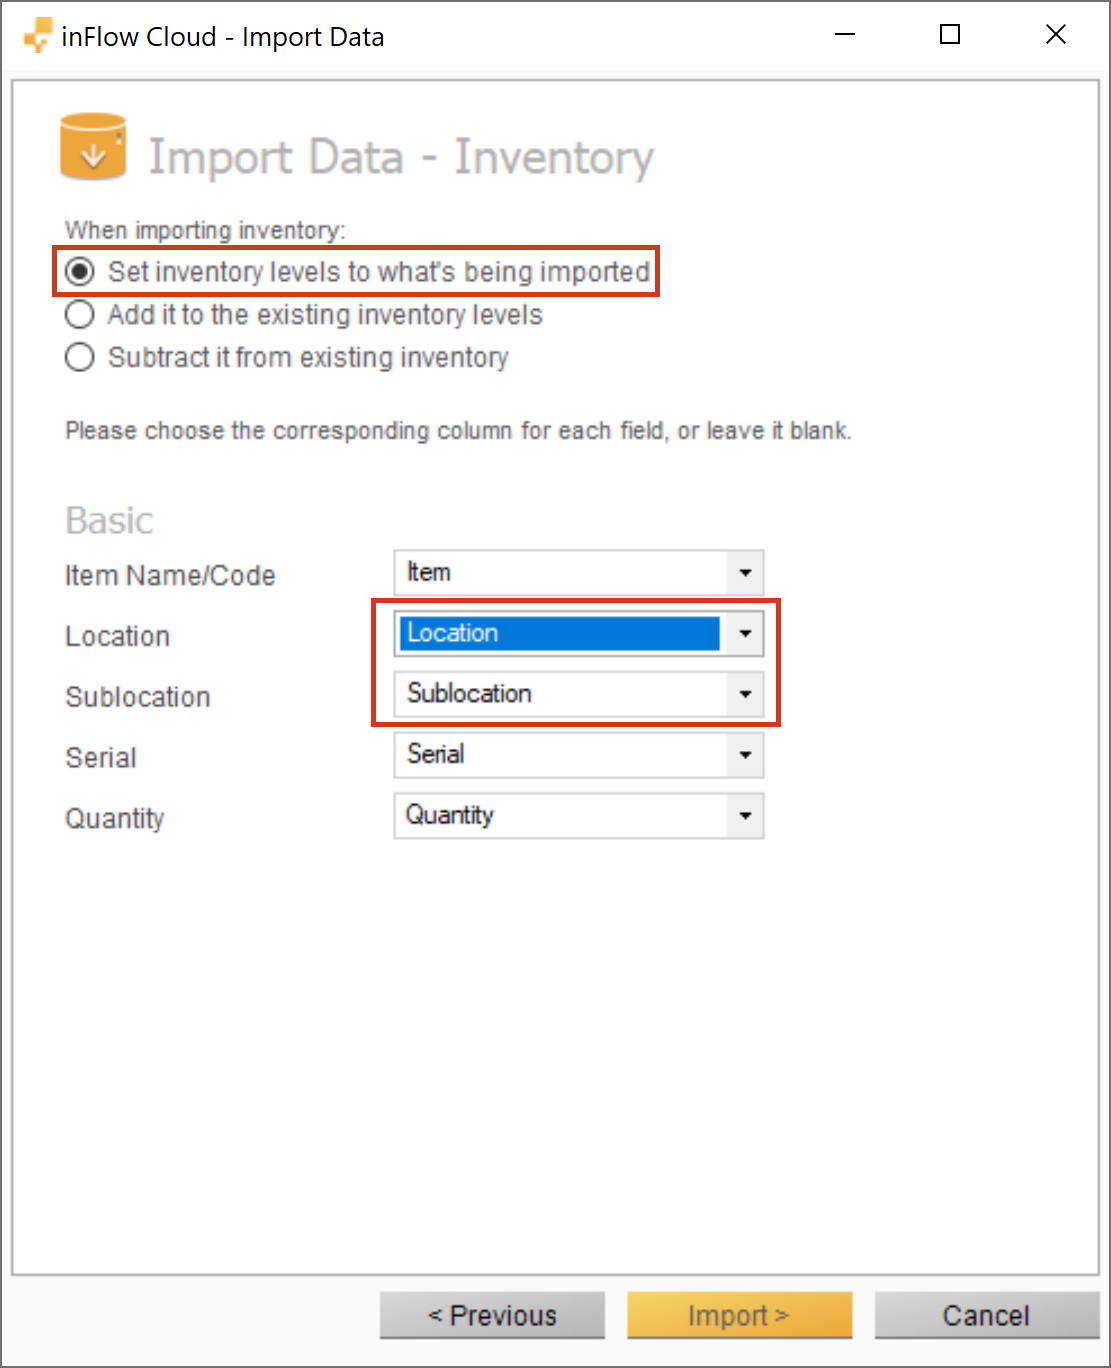
- Select Set inventory levels to what’s being imported and make sure the fields are matched correctly.
- Click Import.
When it’s finished importing, you can check that everything is correct by going to Main Menu > Inventory > Current Stock.
Step 4: Set up reordering per location
- You’ll also need to update your reorder points to match that new location. To do so, export your reorder settings, Main Menu > General > Export Data > Reorder Settings.
- In the resulting spreadsheet, fill down the same Location name you used in the previous steps (e.g. Warehouse or Main Warehouse)
- Then Reimport in by going to Main Menu > General > Import Data > Reorder Settings.