


Web
inFlow Cloud for Web
You can now create new Purchase Orders in the inFlow web app! Just remember: you’ll need at least one vendor already in your system to select it for new orders.
To create a purchase order:
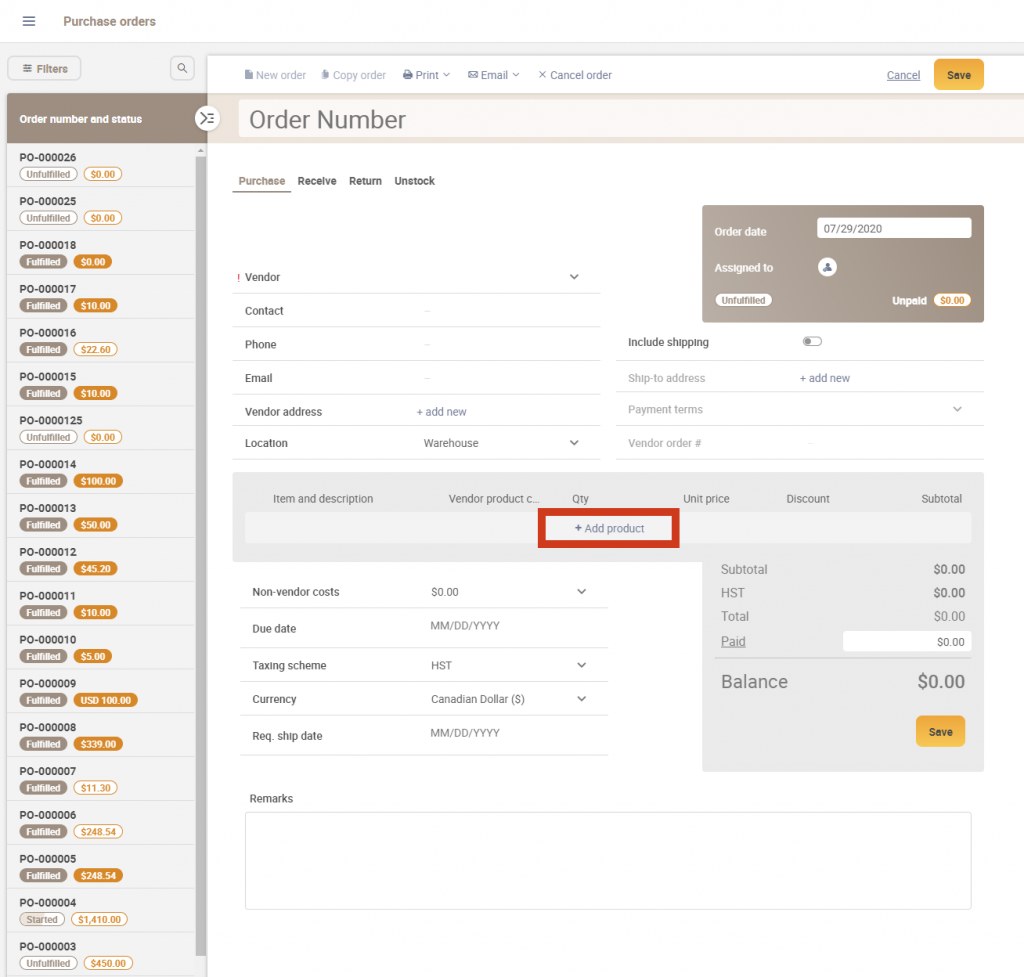
- Click on the Main Menu button (the 3 horizontal lines in the top left corner), then click new purchase order.
- Begin typing into the Vendor field; you should see your vendor’s name appear.
- Click on the first cell in the table and select a product from your list. Continue as necessary until you’ve selected all the items you want to buy from the vendor.

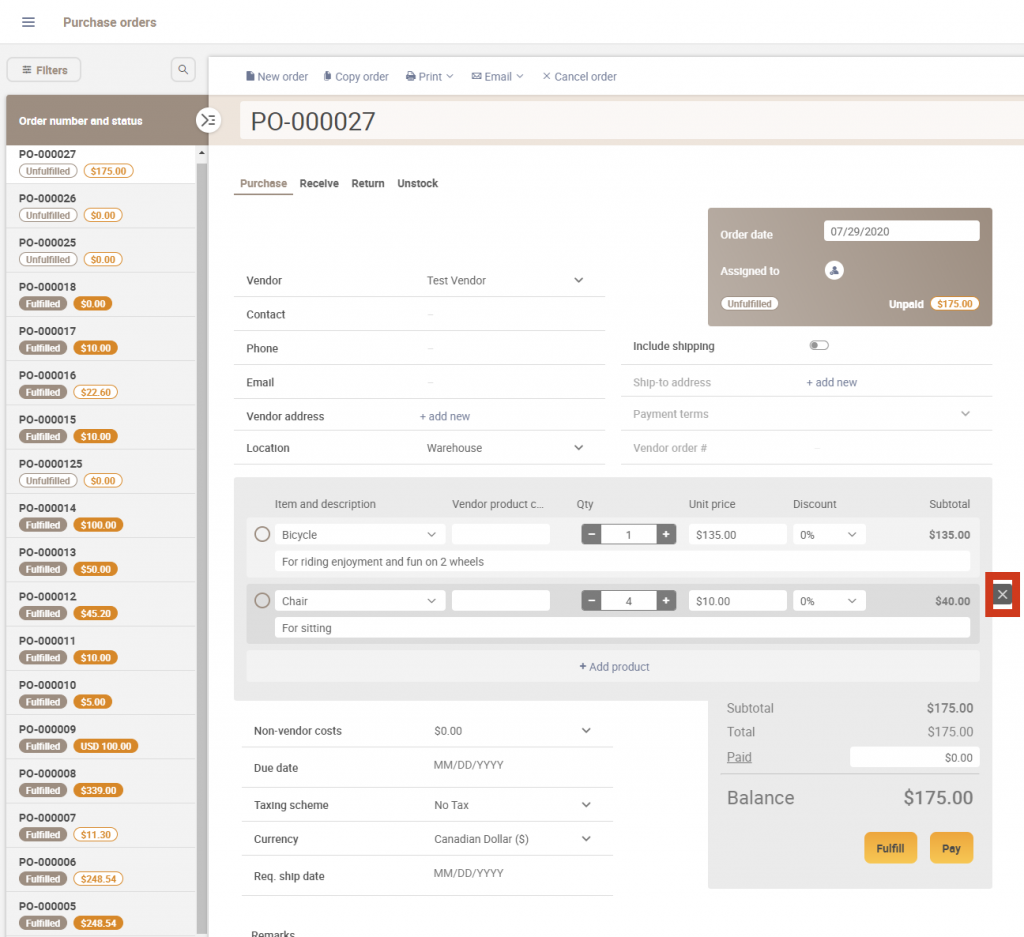
4. If your vendor will be shipping items to your business, toggle the Shipping on button at the top so that you will know where your vendor will be shipping the items. Once toggled, you’ll see additional fields like vendor order#, Payment Terms, Freight, Carrier, and Due Date.
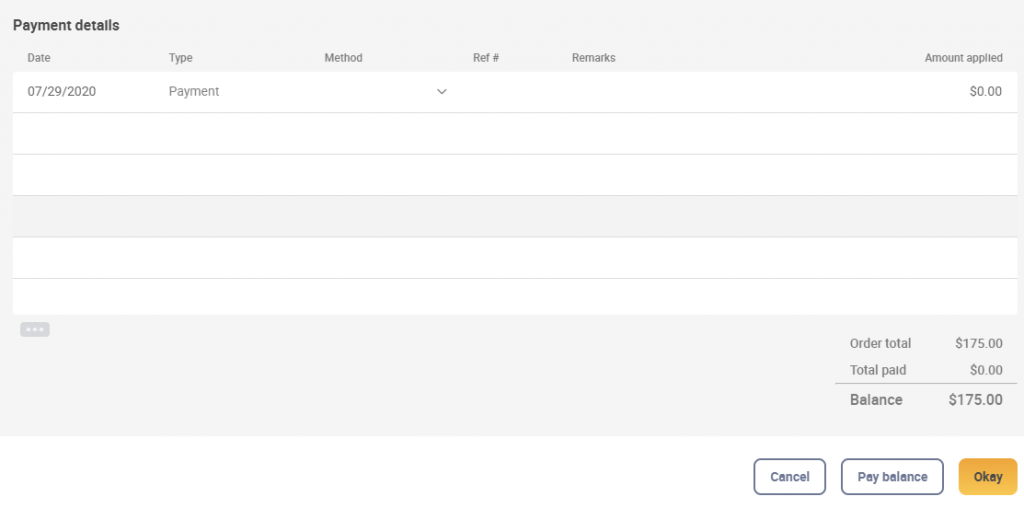
5. You can enter an amount into the Paid field if you’ve made payment to your vendor, or just click the Pay button.

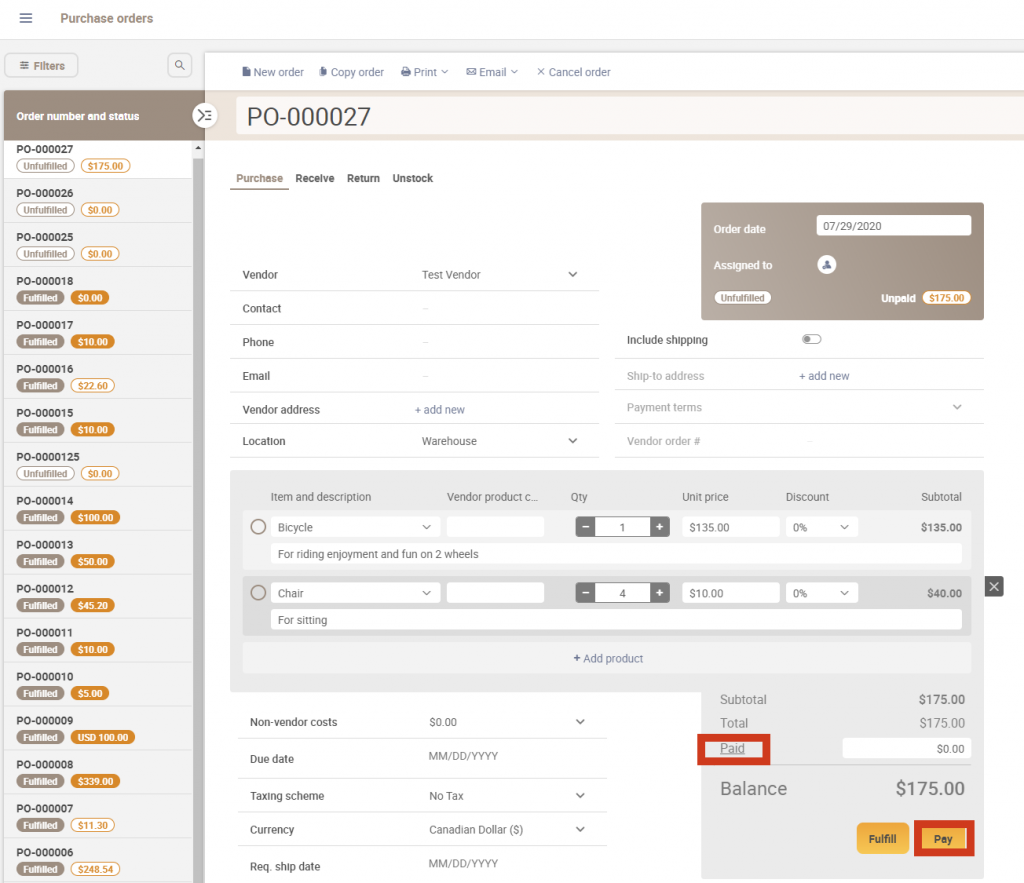
- Clicking on the Paid link will bring up the Payment Details window if you need to enter more detailed information (e.g. payment method, multiple payments).

Did you know you can buy barcodes with inFlow? We’ve teamed up with GS1 to be an official partner. This means can create UPC barcodes that will be recognized by retailers such as Amazon and Walmart. For more details, check out the GS1 Barcode Shop.
To remove products from an unfulfilled order:
- Hover over the row containing the product you want to remove.
- Click the x button beside the row to remove it.

Purchase order list view
You can take a look at all your open and in-progress purchase orders from this list.
At the top of the screen, you can sort the orders by Open, Unpaid, or All. The default is set to Open to view all open purchase orders
Below the main order statuses are additional filters you can use to find the orders you’re looking for. To change which filters are on the screen, click on All filters.
Hover over the headings: the ones with two arrows next to them mean you can sort the orders by that heading. You can sort by Order number and status, Vendor, and more.

What are the default purchase order list settings?
You might be wondering about the logic of how the order list is sorted. Take a look at the table below.
| Open | In this view, you’ll see all purchase orders where fulfillment isn’t complete. Orders will be sorted by requested ship date, and if that isn’t filled out, then by order date. |
| Unpaid | In this view, you’ll see all purchase orders that have the payment status as not paid. Similar to Open, the Unpaid list will sort the oldest unpaid orders first, based on the order date. This will also help you keep track of older unpaid orders. |
| All | In this view, you’ll see all sales orders. This includes purchase order quotes and canceled purchase orders. This will show all orders. You’ll see the newest purchase orders at the top of the list and the oldest at the bottom. |
Windows
inFlow Cloud for Windows
To create a new purchase order in inFlow Cloud:
- Click Main Menu > Purchasing > New Purchase Order.
- Begin by adding your vendor information at the top of the order:
- If your vendor is already in the system, you’ll see them highlighted as you type their name into the Vendor field.
- If your vendor is not in your system yet, continue typing out the full vendor name and click Add New to create a record for them. As you fill out their contact information, inFlow will automatically save it to their product record.
- Location will automatically be set, change the location as needed. If there are multiple locations the items are being sold from, you can simply delete them and leave the field blank. (it’ll pick the item based on the picking options that you set)
- Add items to your order by clicking into the Item column and type-in your product name.
Did you know you can buy barcodes with inFlow? We’ve teamed up with GS1 to be an official partner. This means can create UPC barcodes that will be recognized by retailers such as Amazon and Walmart. For more details, check out the GS1 Barcode Shop.
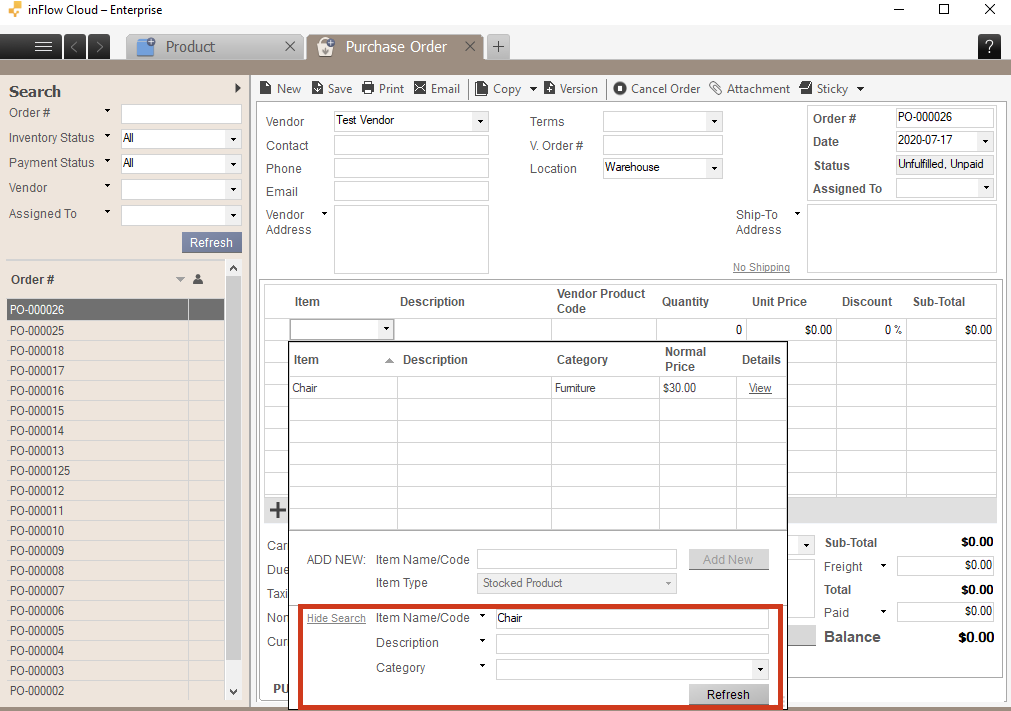
TIP: When adding items to your order, you can filter your product selection by clicking Show Search in the product table. This lets you quickly filter your products by vendor, category, price, and other fields — right from the order!
To complete a purchase order in inFlow Cloud:
- Click Fulfilled when your vendor has fulfilled the order to move the items into your inventory.
- Click Pay when you’ve paid your vendor, this will mark this order as paid.
Video tutorial
What else can I do from the purchase order screen?
Now that you’ve created your purchase order, here are some extra details you can add or modify:
- receiving only part of the purchase order, leaving the rest for later
- returning any damaged items to your vendor
- purchasing serialized items
- add any non-vendor costs (duties, tariffs)
- set up your taxes through the order
Mobile
inFlow Cloud for Mobile
If you’d like to create purchase orders on the go, you can use the inFlow Cloud mobile app!
Click below to jump to a specific section in this guide.
How to create and complete a purchase order
The following are the basics – we’ve packed a lot functionality into mobile purchase orders so be sure to check out the other sections in this guide to learn more about specific actions and screens.

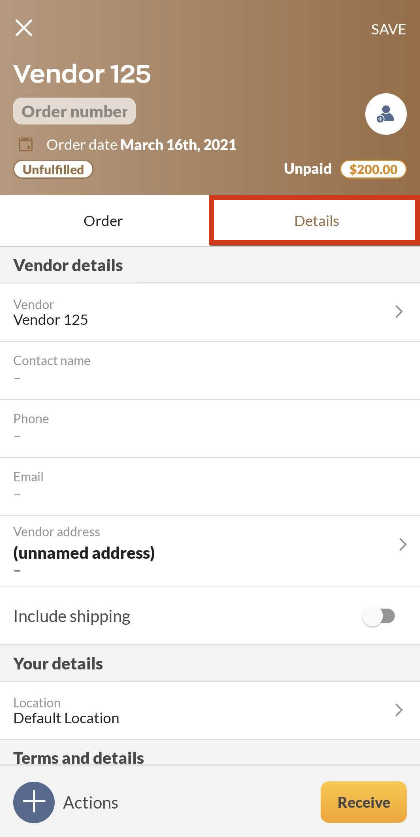
- When the products arrive, you can tap the yellow Receive button.
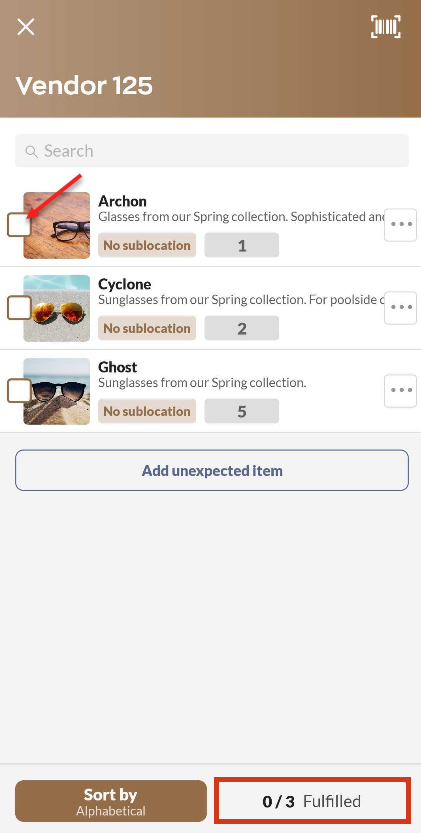
- Select the items you’re receiving from the order – if you didn’t receive the entire quantity of a product, you can partially fulfill it by tapping the ellipsis on the right. Tap the X on the top right to go back to the main purchase order screen, then Save on the top right to save your order.
- If you received all your items at the same time, you can simply tap the Fulfilled button on the bottom right, and then select Autofill. This will lead you back to the main purchase order screen.

Additional actions
Adding products by scanning their barcodes
If your products have barcodes, you can quickly add them to your order using your phone’s camera!
- On the Order tab, tap on Scan item.
- Position the barcode within the frame. When the camera detects a barcode, the Scan item button will turn orange.
- Tap the Scan item button or the camera view to scan the barcode:
- Scanning the same barcode more than once will increase that product’s quantity by 1 for each additional scan.
- You can scan different items all at once from the barcode scanning screen!
- When you’re done scanning your items, tap Done to add these items to the order.
Editing products
Tapping on an item on the purchase order will take you to the Item details screen where you’ll be able to edit the following:
- Quantity: you can tap into the field directly and type in a value, or use the ‘+’ and ‘–’ buttons instead.
- Unit of measure (UoM)
- Unit price
- Item discount
- Taxing scheme

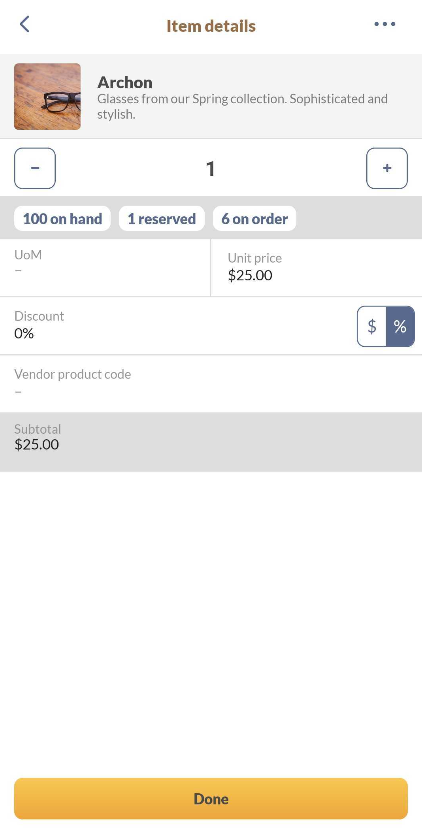
To save your changes, make sure to tap the yellow Done button. Going back using the ‘<‘ button on the top left will close the window and discard your changes instead!
Removing products
Did you add a product to an order that you’d like to remove? Here’s how to do it:
- Tap on the Edit button above the item list in the Order tab.
- Tap the x symbol on the top left corner of the product/s you’d like to remove.
If you’d like to know more about the inFlow Cloud Companion App, check the full guide here!